How to Create Your Own Link-Tree for Instagram on Squarespace

When I first started posting regularly on Instagram, whenever I needed to direct people to a link, I would just change the link in my bio. Overtime, I realized that this wasn’t the best option, because if someone was looking at an older post, they wouldn’t be directed to the correct link as it would likely be different by the time they were seeing it. Plus, it was annoying to have to constantly change my bio.
Around this time, I started to notice how legit bloggers and even big brands, often had a “link-tree” as the link in their bio. This way, they could have multiple links posted at one time for visitors to choose from.

GENIUS! So I set out to create my own link-tree and I figured out a way to create one on my Squarespace website. I decided to save ya’ll a little time and share a short tutorial.
STEP 1: Create a new page in Squarespace. I named it “Link Tree.”
STEP 2: Hide the Header of Your Website on the New Page
To do so…
1) Right click (or ctrl + click if you’re using a Mac) on the new Link Tree page and choose “View Page Source.”
2) On this page, search for the new page name using a hyphen instead of a space. For example, on my Mac, I used command + F, then in the search bar, put: Link-Tree. Once you find the page name, a few words next to it, you should see “collectionId” then a long string of numbers (highlighted in pink). Copy that long string of numbers.

Then, back on your Squarespace dashboard, under the main menu, go to Design > Custom CSS and put in the following code (this code is specifically for Brine family templates, if you’re using a different family of templates, the code may be different):
//Hide Header on Link-Tree//
#collection-(the number you copied goes here) {
header {display: none !important;}
}
#collection-(the number you copied goes here)
.Mobile-bar.Mobile-bar--top
For example:

STEP 3 - Return to the New page you just created and create a new heading:
I added my logo and a text-link that takes people straight to my website.
You could also add a Call to Action button at the top, with whatever action you want people to take.

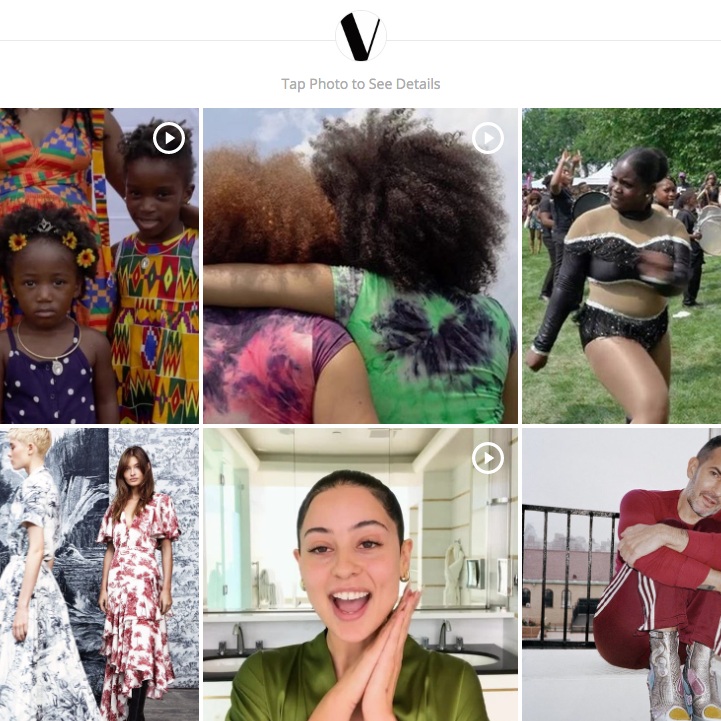
STEP 4 - Add a text block that says: “Tap Photo to See Details”
STEP 5 - Under the text block, insert a Photo Gallery
On the Design tab of the Photo Gallery, I chose these options:
Aspect Ratio: 1:1 Square
I checked “Crop Images”
I un-checked “Show Title”
3 Thumbnails per row
10 - Padding around images
Unchecked Light Box
Unchecked Open Links in New Window

Now, you’ve created a custom link-tree!
Whenever you need to link to a blog post or something, just add a new image into the gallery and then link that image (via the gear icon when you hover over the image) to wherever you need.